Saturday, February 16, 2013

Banana Bread Brownies with Brown Butter Frosting

I always seem to have ripe bananas on hand. I wanted to go beyond the bread and muffins I usually make and this was perfect. These brownies were so moist and much more delicate than the usual pumpkin bars I make. I followed the recipe exactly, no need to change what's not broken. 
Just a tip though, make sure you have all the ingredients before you start browning the butter. Yeah, I didn't have close the amount of powdered sugar  I needed. Thankfully, Casey's had a box, and it was only $2 more than if I had been prepared and bought it from Fareway. Ugh. 
So, I had these delicious brownies made. A huge 15x10 pan of them. Mom's Morning Out was the next day, I thought I would bring some to share. And then we get a blizzard?! Yes, no school the next day, no MMO, and a pan of brownies staring at me, all day.
I apologize to all my MMO friends for the brownies you never got to eat. I promise I will make it up to you!
Here's the recipe so you can try them out:
Banana Bread Brownies with Brown Butter Frosting

***It's a great tongue twister for the kids. You want another brownie? Say it three times fast!

Pork Chops with Balsamic Maple Glaze & Honey Roasted Red Potatoes

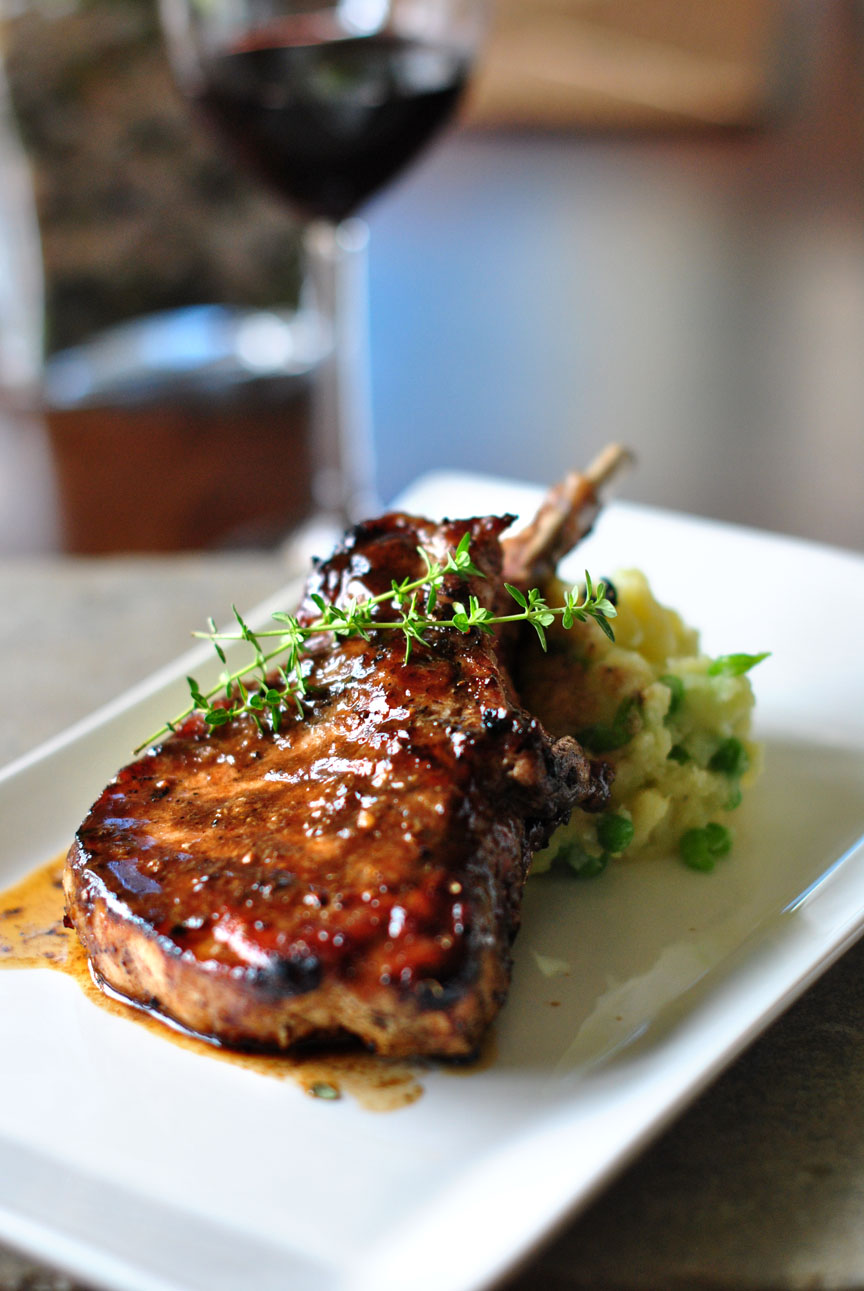
I am apologizing in advance for the bad photo. I think I've said it before, I'm not a food photographer! I would love to learn some tips on how to take a decent photo - at night - in the kitchen. So far, I haven't figured it out. In spite of the bad photo, this was an excellent meal! Both were new recipes for me. I was looking for meal ideas using things I already had so I turned to trusty pinterest for some ideas. I came across this recipe for Pork Chops with Balsamic Maple Glaze and this is the picture I saw:
Now, who wouldn't want to eat that?! I modified her recipe quite a bit. I wanted to cook mine in the electric skillet and have the sauce a little thicker as it cooked. This is where I think my time in the kitchen is paying off. Here is my version:
Meat:
6 Center Cut Tenderloin Chops
Balsamic Glaze:
2/3 cup Balsamic Vinegar
1 2/3 cup chicken stock
4 Tbsp maple syrup
2 tsp mustard
4 cloves garlic, smashed
Dash each dried thyme and dried rosemary
Sprinkle of cornstarch
4 Tbsp butter

Bring all the ingredients (except butter) together to gentle simmer. Whisk to break down cornstarch. Let it thicken up slightly. Throw in cubes of cold butter and whisk-it will make the sauce nice and glossy. 
Heat skillet to 350 degrees with a splash of oil. Season the chops with salt and pepper and sear on each side. Pour sauce/glaze on top of chops, cover and cook for 2-3 hours. 
This is how mine turned out, but again not a representation of taste! They fell off the bone, they were so tender. All the kids loved it and Annaliese even wanted seconds, that doesn't happen very often. 

The potatoes on the side were a slightly altered version from Allrecipes.com. This is the original recipe for the Honey Roasted Red Potatoes.  Here is my version:
Ingredients:
1.5 pounds red potatoes quartered
1/2 onion, diced
2 Tbsp. butter, melted
2 Tbsp. honey
1 tsp. cayenne
1/2 tsp. salt
1/2 tsp. fresh ground pepper

Directions:
Preheat oven to 375 degrees. Line an jelly roll pan with foil, coat with non-stick spray.
Mix all ingredients in large mixing bowl.  Spoon onto pan in an even layer. 
Bake one hour, stirring halfway through cooking. 

***These chops are going into our freezer meal rotation. I make the sauce up ahead of time, place the chops and sauce in a freezer bag. After they have thawed, you can cook in either a slow-cooker or oven. 
***If anyone wants to throw out some photography tips, I might be able to provide compensation with food?!!! Think about it!


Thursday, January 17, 2013

Sweet Blueberry Muffins

My dear friend, Jess Hansen, is a wonderful cook. She makes her own baby food and sells it at the Farmer's Market in Cedar Falls. She also has three lovely little boys and a sweet little girl on the way. Like myself, she is busy in the kitchen quite often. I love that she shares her recipes, especially when they are as delicious as this one!
As she says, they are very easy to put together. I did mine right before the kids got home from school. They enjoyed them hot out of the oven, probably spoiling their dinner?! It was nice to send something hot for them to eat as two of them headed back to school for Lego Club. I think these are quite possibly the best blueberry muffins I've ever had. I even forgot to add the sugar on top. Please try them soon!
You can find the recipe here: Mama Made. And if you have time, poke around and find lots of other great recipes!

Wednesday, January 16, 2013

Mini Pies - Apple Chai

I got a chance to make my first batch of Mini Pies. The recipe that caught my eye first, and probably made me buy the book in the first place - Apple Chai. I have never had Chai Tea before, so I can't verify the authenticity of the flavors. However, I loved these perfect little bite size pies, regardless of the name. I can say they've got quite a bit more spice than a traditional apple pie. More spice is good!
I may have mentioned previously that I've never made pie crust from scratch? It's true. I'm extremely intimidated by the whole process. There's so much stress on making sure everything is very cold, and don't roll it too much and make sure there's enough flour when you roll it out, etc. Once I finally decided to get over myself, I followed the very easy recipe for the "Perfect Pie Crust" and then did the filling. It really wasn't as complicated as I thought it was going to be. And to tell the truth, I have the perfect kitchen for it. My kitchen is at least 10 degrees colder than the rest of the house, even butter doesn't soften in my kitchen, no matter how long you leave it out. I think it's the perfect environment for pie making, see - looking on the positive side!
I will say, it's messy. All that flour all over the place. But, totally worth it. The tart pan was a little too big, so my little pies didn't look as perfect as the ones in the picture.
All ready to go in the oven. What I realized after I got them all prepared, I didn't use enough apples. The recipe only called for two apples, I should have used three. The filling should come up to the top of the pie crust. I know for next time.
Aren't these the cutest little things? Besides looking less than perfect, the taste was incredible. I highly recommend these. There are a quite a few more on my list to make. I'm thinking Pink Lemonade next?
(And by the way, this counts as 2 recipes - pie crust and the filling! I'm all about multi-tasking.)
 
Perfect Pie Crust - as adapted from Mini Pies
8 Tbsp. butter (1stick)
6 Tbsp. shortening
2 1/2 cups all purpose flour
2 tsp salt
4 tsp sugar
6-8 Tbsp ice water
 
1. Chop the butter and and shortening into 1/4 inch pieces. Place in the freezer to chill while you prepare the other ingredients.
2. Blend the flour, salt and sugar in a food processor. Add the chilled shortening and process until the mixture climbs the walls of the processor bowl. Add the butter, one piece at a time, and process thoroughly.
3. Add the ice water 1 tablespoon at a time until the mixture comes together in a ball and makes 2 laps around the processor bowl.
4. Remove the dough, divide it in half, and flatten each half into a disc. Wrap each disc in plastic wrap and chill in the refrigerator for 30 minutes.
 

Apple Chai - as adapted from Mini Pies
2 apples peeled, cored and diced into 1/4 inch pieces (Granny Smith, I would recommend 3 apples)
1/4 cup brown sugar
1/4 cup granulated sugar, plus extra for sprinkling
1/2 tsp ground cinnamon
1/8 tsp ground cardamom
1/4 tsp ground allspice
1 tsp vanilla extract
1 Tbsp lemon juice
Perfect Pie Crust (recipe above)
1/4 cup soy milk
 
1. Preheat oven to 350 degrees. Generously grease a 12-cup muffin tin with butter or cooking spray.
2. Combine the apples, brown sugar, granulated sugar, cinnamon, cardamom, allspice, vanilla and lemon juice in a large bowl. Let sit for 10 minutes to allow the flavors to blend.
3. On a thoroughly floured surface, roll out the pie crust to a thickness of 3/16 inch. (I didn't have a ruler that measured out that size, so I just guessed) Using a 4-inch diameter round cutter, cut 12 crusts (I used a tart cutter) Re-form and re-roll the dough as necessary, keeping plenty of flour on your work surface.
4. Using the mini cookie cutter of your choice and leftover pie crust, cut out 12 shapes to use as pie toppers. (I used stars like the ones in the pictures in the book)
5. Carefully shape the crusts into the wells of the muffin tin, crimping the edges with your fingers.
6. Fill each mini pie with 1 1/2 tablespoons of the apple mixture. The filling will settle while baking, so it's best to fill the pies higher than the top of the muffin tin. Top each mini pie with a pie topper.
7. With a pastry brush, lightly brush the pie crusts with soy milk, then sprinkle with sugar.
8. Bake for 20-25 minutes, until the crusts are golden brown. Allow to cool for a few minutes in the muffin tin, then carefully remove the pies from the tin and place on the wire rack to finish cooling. To remove, first try to spin the pies in the muffin wells. If they need a little extra help, run a butter knife along the edge of the crusts to pop them out of the tin.
9. Serve, or store in an airtight container at room temperature for up to 2 days.
 
Enjoy!


Wednesday, January 9, 2013

Chocolate Chip Muffins

As I mentioned in my Block Seven blog, part of my New Year's resolution is to try 60 new recipes. That bodes well for this blog. I would have had this ready to post last week, were it not for some quirky blogger issue with uploading pictures. Without boring you to tears with the details, suffice it to say, it might have been supremely helpful if I had - at any point - taken a computer science class. However, now that I have it figured out, I finally get to start blogging again!
My first recipe of the year: Chocolate Chip Muffins
Most of my recipes begin here with the basics. My new labeled jars make me smile. The jars are from Target and I found these labels on an Etsy site, super easy to apply and don't they look great?!
The second place I go, my drawer that holds my measuring tools etc. Imagine my surprise (not really) when I opened it and found all of these wood shavings in my drawer? Backtrack a little, Brad has finally started on my counter tops, in the process, he made a mess. But, being that I'm trying to find the joy in everything, I looked at it as an opportunity to clean it out and organize, which I had been planning to do anyway. Just not right now when I'm trying to make my muffins, but I digress.

I'm always a little reluctant to continue with a recipe when I find that I have way too much left over, as in this case. The recipe said it made 12 regular size muffins. I had a ton left over. What to do? I decided to make a really big muffin, using the tart liners I had purchased for another recipe. Great solution right?
The regular muffins turned out just fine, thankfully.
Annaliese said something to the effect of "You'll really like them, they're awesome!" Love that girl! 
What I wasn't planning on with the big one, how much it would rise. Holy cow! Hailey ended up bringing it to her teacher. Apparently, he liked it as well.
The Chocolate Chip Muffins were a hit. I will definitely make them again. I'd love to try the Poppy Seed ones.
My next project is to learn to make pie crust. For some reason, I'm very intimidated by the whole process. I found this little book at Target on clearance. I've been watching it on the end cap for quite some time and it finally went to 75% off, I figured that was my sign it was time.
There are some fantastic looking recipes in this little book. The first one I have planned to try is the Apple Chai. I'm not sure when these recipes will make an appearance on here, but rest assured, it will be soon!

Tuesday, September 4, 2012

TIO Tuesday - Smashed Potatoes and Taco Cupcakes

We have a new favorite side dish - Smashed Potatoes! I have seen a few recipes for these in magazines recently, but opted for Pioneer Woman's recipe, she calls them Crash Hot Potatoes. I just know I can never go wrong with her recipes! I had made these for a Saturday dinner paired with Pork Chops. However, Brad was working late on a project and he didn't make it home in time. The kids were the first to try them and they all loved them. By the time Brad got home, they had cooled considerably and we waited for him to come inside. He ended up talking in the driveway with a friend for quite a while, so I brought the whole pan out for them to snack on. They were gone right away. I would say that's a good indicator of a great recipe.   
 

Ingredients

  • 12 whole New Potatoes (or Other Small Round Potatoes)
  • 3 Tablespoons Olive Oil
  • Kosher Salt To Taste
  • Black Pepper To Taste
  • Rosemary (or Other Herbs Of Choice) To Taste

Preparation Instructions

Bring a pot of salted water to a boil. Add in as many potatoes as you wish to make and cook them until they are fork-tender.
On a sheet pan, generously drizzle olive oil. Place tender potatoes on the cookie sheet leaving plenty of room between each potato.
With a potato masher, gently press down each potato until it slightly mashes, rotate the potato masher 90 degrees and mash again. Brush the tops of each crushed potato generously with more olive oil.
Sprinkle potatoes with kosher salt, fresh ground black pepper and fresh chopped rosemary (or chives or thyme or whatever herb you have available.)
Bake in a 450 degree oven for 20-25 minutes until golden brown.

****

Next up is a pinterest find from a few months ago. I've seen these Taco Cupcakes often, I even bought black beans to use in the recipe, but never made them. I ended up modifying two recipes to come up with this. It worked great and I would make these again. I took a picture showing all the different steps. It's much easier to see how they come together this way. Starting from the top left and working across, you can see each layer. The last three are completed cupcakes. I hope that makes sense?

Finished cupcakes - so easy to eat with your hands, a fun appetizer too!
The recipe closest to the one I used is found at Just Us. But, what I have listed below is what I used.
 
1 lb. ground beef
1 package taco seasoning
1 can canned black beans, drained and rinsed
16 won ton wrappers (found in the produce section)
5 T + 1t of queso dip or salsa con queso
1 c chunky salsa
1 c shredded co jack cheese
 
Brown the ground beef, drain, add the taco seasoning and water as noted on package. Mix in the beans. Spray muffin tins and layer as noted in picture, starting with won ton wrapper, then queso dip, meat mixture, salsa, cheese and again with won ton wrappers in order. Bake at 375 degrees  for 20 minutes.
*** I had quite a bit of meat mixture left, so I enjoyed taco salads for lunch the next couple days. I wasn't complaining...
 
Enjoy!!!
 

Friday, August 17, 2012

TIO Tuesday (a few days late...)

My sister is expecting her first child. She still hasn't popped and we're at two days past the due date. I had travelled up to Minnesota on Monday hoping that she would conveniently have her while I was there. It didn't happen. I left Wednesday to come home with the girls and now it's Friday and still no baby! I wasn't able to get my blog done while I was there, but I had plenty of recipes I could share. There are some weeks that I just haven't had time to make something new or I'm not feeling that inspired. Ironically, the one week I can't get online is the week I've got a lot to share!
First up: Man Chicken - funny title, great dish.
I had pinned this quite some time ago. I went through all my recipes to pick out some that I hadn't tried and this one popped up. I put it in a ziploc bag to marinate which makes it a good one to put in the fridge in the morning and throw in the oven later that night.
  • Chicken thighs- 1 package (1.5lbs.)
  • Dijon mustard- 1/2 cup
  • Maple syrup- 1/4 cup
  • Rice wine vinegar- 1 tablespoon
  • Fresh rosemary

  •   
    Lining the dish with foil makes clean up a breeze. Yes, the man did like the chicken. I didn't use the rosemary, all else was the same. I paired it with homemade onion rings, next up... 
    Anyone that knows me, knows I love onion rings. I love all kinds of onion rings, thick, thin, spicy, salty. These were a hit, I highly recommend them, make sure you let them soak in the buttermilk for a while, it makes a huge difference. Wouldn't you know, I can't find the original recipe?! That's what I get for waiting to post it. I do know I used buttermilk, flour, cornmeal and cayenne pepper. I will find the recipe - someday. In the meantime, don't they look great? I'm craving onion rings now.
     I remember seeing this on one of Pioneer Woman's episodes on the Food Network. At the time I thought it looked pretty good, but Brad isn't much of a creamed corn kind of guy. Then, I got this months issue of Food Network and this recipe was in there. I took it as a sign and made the recipe. Lo and behold, Brad loved it. Not just loved it, raved about it and raved. It's actually not much like cream style corn from a can. It's so much better and the spicy kick definitely takes it up a notch. Half the kids liked it, half thought it was too spicy. But it didn't really matter, Brad and I finished all the rest.
    Baked Creamed Corn with Red Peppers and Jalapenos

    Ingredients

    • 8 ears corn, husked
    • 2 red bell peppers, diced
    • 2 jalapeno peppers, diced
    • 1 cup heavy cream
    • Kosher salt and freshly ground pepper
    • 1 stick salted butter, cut into pieces

    Directions

    Preheat the oven to 350 degrees F. Slice the corn kernels from the ear in a large, deep bowl with a sharp knife. Turn the knife to the dull side and scrape the cob all the way down to remove all the bits of kernel and the creamy milk.
    Add the red bell peppers, jalapenos, heavy cream, 2 teaspoons salt, a generous amount of pepper and the butter and mix well. Pour into a 9-by-13-inch baking dish. Bake until hot and bubbly, 45 to 55 minutes.

    *** I don't have a picture for the last recipe I made. It was so good and it's a great base for other meals. I had made it for my friend and her family after her husband's illness. It smelled fantastic as it cooked in the crockpot. I made a small batch for myself so I could try it, I'm glad I did. I mentioned I left town earlier this week, and Brad was home alone for a few days. Before I left Monday morning, I made another batch of this for him to eat while I was gone. He was very happy and there was still quite a bit left when I returned. I used the remainder to make Chicken Enchiladas.  and a Chicken Casserole. I'm loving my crockpot right now! I do hope you try some of these recipes, and let me know what you think!
    4-6 Chicken Breasts or 1 Whole or cut up Chicken
    1 Can of any kind of Beer
    1/2 tsp Garlic Powder
    1/2 tsp Basil
    1/2 tsp Paprika
    1/2 tsp Black Pepper
    1/2 tsp Kosher Salt
    *You can use whatever spices you like
    Put all ingredients into crockpot
    if frozen cook on high 4-5 hours or low 8-10
    If fresh cook on high 3-4 hrs or low 7-8 hours if fresh
    **** I did use frozen chicken and a can of Busch Light :)

    Enjoy!